Deploying infrastructure to Azure using Terraform and GitHub Actions

By Florian Maas on April 2, 2023
Estimated Reading Time: 10 minutes
If you are reading this blog post, I'm assuming you already made the decision to deploy your infrastructure using Terraform rather than building it manually through the Azure Portal. Therefore, I won't go into detail about the benefits of using Infrastructure as Code (IaC) over the manual alternative. However, you may still be trying to determine or figure out the best way to use Terraform to deploy infrastructure to Azure.
One potential method is to sign in using az login, create a local backend,
and then utilize your user's permissions to deploy the infrastructure. However, this approach has two significant issues:
- It prevents users from collaborating effectively on the same infrastructure, since the state is only stored locally and thus users do not always have access to the latest state data.
- Any user who wishes to deploy infrastructure needs to have the permissions to do so in Azure, violating the principle of least privilege. This is a very large security risk.
Using a Service Principal to deploy the infrastructure through GitHub Actions with a remote backend solves these issues; Anyone can deploy infrastructure on Azure by running the appropriate workflow on GitHub, even though they do not have elevated permissions in Azure.
In this tutorial I will demonstrate how the above can be achieved. All code used in this tutorial can be found on GitHub:
Let's get started!
1. Creating a Service Principal
Before we specify or deploy any infrastructure, we should create a Service Principal. This way, we do not need to give any team members permissions to deploy infrastructure on Azure. Instead, we grant the Service Principal the permission to deploy infrastructure, and use that to authenticate from GitHub Actions.
First, make sure you have the Azure CLI installed. Then, we login using an account with
administrative privileges on our subscription. Replace <TENANT_ID> with your Azure Tenant ID.
az login --tenant <TENANT_ID>
Then we can create the Service Principal as follows:
export SUBSCRIPTION_ID=$(az account show --query id -o tsv)
export SERVICE_PRINCIPAL_NAME="MainInfra"

az ad sp create-for-rbac \
    --name $SERVICE_PRINCIPAL_NAME \
    --role "Owner" \
    --scopes "/subscriptions/$SUBSCRIPTION_ID" > credentials.json
This will create an App Registration and a Service Principal, which you can view in the Azure Portal
under Azure Active Directory > App Registrations. For more information regarding App Registrations and Service Pricipals, see
here.
The command above will also create a file called credentials.json in your working directory.
This file contains the necessary authentication credentials for the Service Principal.
credentials.json to your .gitignore now, and delete the file completely after the next step.In order for GitHub Actions to use the created Service Principal to authenticate to Azure, we need to set the created credentials as Secrets. Run the following command in your terminal to see the key-value pairs that should be set:
echo "GitHub secrets:"
echo ARM_CLIENT_ID = `cat credentials.json | python -c 'import json,sys;obj=json.load(sys.stdin);print(obj["appId"])'`
echo ARM_CLIENT_SECRET = `cat credentials.json | python -c 'import json,sys;obj=json.load(sys.stdin);print(obj["password"])'`
echo ARM_TENANT_ID = `cat credentials.json | python -c 'import json,sys;obj=json.load(sys.stdin);print(obj["tenant"])'`
echo ARM_SUBSCRIPTION_ID = `az account show --query id -o tsv`
Create a GitHub repository if you have not done so yet, and add the Secrets to your repository (or organization).
When you are done, delete the file credentials.json.
2. Backend configuration
Since we are going to deploy using Terraform from GitHub Actions, we cannot simply store the state locally (and even if we could, we probably shouldn't, as mentioned earlier).
Let's create the following file structure:
├── .gitignore
├── .env.backend
├── terraform
│   └── providers.tf
Where the contents of providers.tf and .env.backend are the following, respectively:
provider "azurerm" {
  features {}
}

terraform {
  backend "azurerm" {
    resource_group_name  = var.state_resource_group_name
    storage_account_name = var.state_storage_account_name
    container_name       = "tfstate"
    key                  = "terraform-base.tfstate"
  }
}

data "azurerm_client_config" "current" {}
TF_VAR_state_resource_group_name=hobbesinfra-rg
TF_VAR_state_storage_account_name=hobbesinfra
TF_VAR_location=westeurope
Here, we have defined that we want to use Azure as the backend to store our Terraform state file, and we have also
defined the resource group name, the storage account name, and the container name in which we want to store our state file.
We make use of the fact that an environment variables prefixed with TF_VAR_<name> will set the value for the
variable <name> in Terraform.
You can change the values in .env.backend to your preference, but keep in mind that some names have to be
globally unique.
The next step would be to actually create these resources. Since we do not want to rely on our user permissions,
and we already have configured GitHub Actions to use our Service Principal, we can also create a GitHub Action to
create the required resources for Terraform's backend.
Let's add the file ./github/workflows/deploy-tf-state-bucket.yml to our project:
name: Deploy Terraform state bucket

on:
  workflow_dispatch:

jobs:
  deploy:
    name: 'Deploy Terraform state bucket'
    runs-on: ubuntu-latest

    defaults:
      run:
        shell: bash

    steps:
      - name: Checkout
        uses: actions/checkout@v2

      - name: Deploy state bucket
        run: |
          set -a
          source .env.backend
          az login --service-principal \
            -u ${{ secrets.ARM_CLIENT_ID }} \
            -p ${{ secrets.ARM_CLIENT_SECRET }} \
            --tenant ${{ secrets.ARM_TENANT_ID }}
          az group create \
            -l $TF_VAR_location \
            -n $TF_VAR_state_resource_group_name
          az storage account create \
            -n $TF_VAR_state_storage_account_name \
            -g $TF_VAR_state_resource_group_name \
            -l $TF_VAR_location \
            --sku Standard_LRS \
            --allow-blob-public-access false
          az storage container create \
            --name tfstate \
            --account-name $TF_VAR_state_storage_account_name
In this workflow, we use the secrets we have set earlier to login into Azure as the Service Principal, and subsequently we create the required resources.
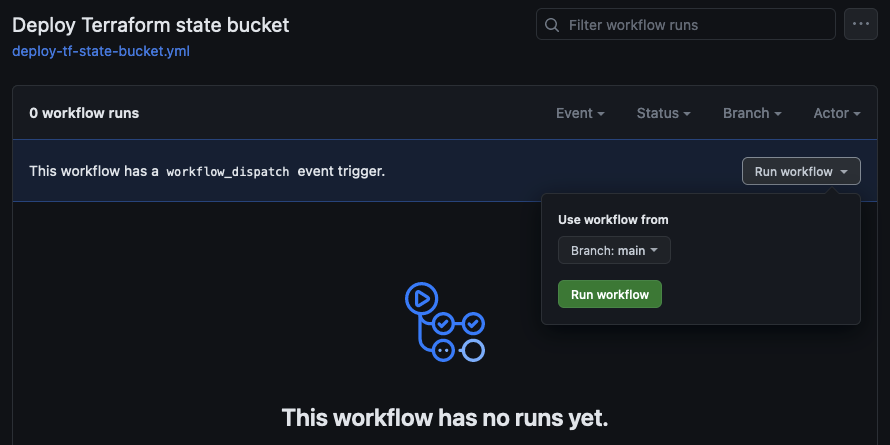
We are now ready to try this out! Commit your changes and push them to your GitHub repository. Then, in your Repository, navigate to
Actions, select Deploy Terraform state bucket, and press Run workflow.
If all went well, you should see the action succeed within a minute or so:

We can verify that the resources have been created in the Azure Portal, or using the Azure CLI:
az group list --query "[0]".name -o tsv
> hobbesinfra-rg
There we go, the backend is ready to be used by Terraform!
3. Deploying infrastructure
Now that we have our backend configured and deployed, the next step is to actually deploy some infrastructure using
GitHub Actions and Terraform. For this purpose, let's define some very basic infrastructure by adding two more files
to the terraform subdirectory:
main.tf
resource "azurerm_resource_group" "main" {
  name     = "${var.app_name}app-rg"
  location = var.location
}

resource "azurerm_storage_account" "main" {
  name                     = "${var.app_name}appsa"
  resource_group_name      = azurerm_resource_group.main.name
  location                 = var.location
  account_tier             = "Standard"
  account_replication_type = "LRS"
}

resource "azurerm_storage_container" "main" {
  name                  = "content"
  storage_account_name  = azurerm_storage_account.main.name
  container_access_type = "private"
}
variables.tf
variable "app_name" {
  type        = string
  description = "name of the app"
  default     = "hobbes"
}

variable "location" {
  type        = string
  description = "Location of Resources"
  default     = "westeurope"
}
All this does is deploy a resource group with a storage account containing a single blob container.
Although not strictly necessary, it is now recommended to make sure you have the Terraform CLI installed and run;
terraform -chdir=terraform init -backend=false
to lock the provider's versions. I personally find it useful to add this and some other commands to a Makefile, so if you find it useful you could add that to your project as well. A simple Makefile for this project can be found here.
Now that we have defined our infrastructure, we need to provide a GitHub Actions workflow that actually deploys this infrastructure.
For that purpose, create the file .github/workflows/on-release-main.yml with the following contents:
on:
  release:
    types: [published]
    branches: [main]

name: On Release Main

jobs:
  terraform:
    name: 'Terraform'
    runs-on: ubuntu-latest
    env:
      ARM_CLIENT_ID: ${{ secrets.ARM_CLIENT_ID }}
      ARM_CLIENT_SECRET: ${{ secrets.ARM_CLIENT_SECRET }}
      ARM_SUBSCRIPTION_ID: ${{ secrets.ARM_SUBSCRIPTION_ID }}
      ARM_TENANT_ID: ${{ secrets.ARM_TENANT_ID }}
      TF_VERSION: 1.3.6

    defaults:
      run:
        shell: bash
        working-directory: ./terraform

    steps:
      - name: Checkout
        uses: actions/checkout@v2

      - name: Setup Terraform
        uses: hashicorp/setup-terraform@v2
        with:
          terraform_version: ${{ env.TF_VERSION }}

      - name: Terraform fmt
        id: fmt
        run: terraform fmt -check

      - name: Terraform init
        id: init
        run: |
          set -a
          source ../.env.backend
          terraform init \
            -backend-config="resource_group_name=$TF_VAR_state_resource_group_name" \
            -backend-config="storage_account_name=$TF_VAR_state_storage_account_name"

      - name: Terraform validate
        id: validate
        run: terraform validate -no-color

      - name: Terraform plan
        id: plan
        run: terraform plan -no-color

      - name: Terraform apply
        id: apply
        run: terraform apply -auto-approve
It is also recommended to add a workflow that validates the Terraform files and shows the changes to be deployed for each pull request. If you wish to do so, also add the file on-pull-request.yml.
If you followed the steps in this tutorial, your project should now contain the following files:
├── .env.backend
├── .github
│   └── workflows
│       ├── deploy-tf-state-bucket.yml
│       ├── on-pull-request.yml (optional)
│       └── on-release-main.yml
├── .gitignore
├── Makefile (optional)
├── README.md
└── terraform
    ├── .terraform
    ├── .terraform.lock.hcl
    ├── main.tf
    ├── providers.tf
    └── variables.tf
Now we are ready to deploy our infrastructure! We commit and push the changes to the
main branch of our git repository, and create a new release with the tag 0.0.1 through the GitHub UI.
After a few minutes we should see that our Action has completed succesfully, and again we can validate that our infrastructure has been created
either in the Azure portal, or using the Azure CLI:
az storage container list --account-name hobbesappsa --query "[0]".name -o tsv
> content
Which is indeed the name of the container that we created!
I hope this was helpful, if you have any questions or feedback, feel free to reach out.
Florian